 HAPPY LEAP DAY!
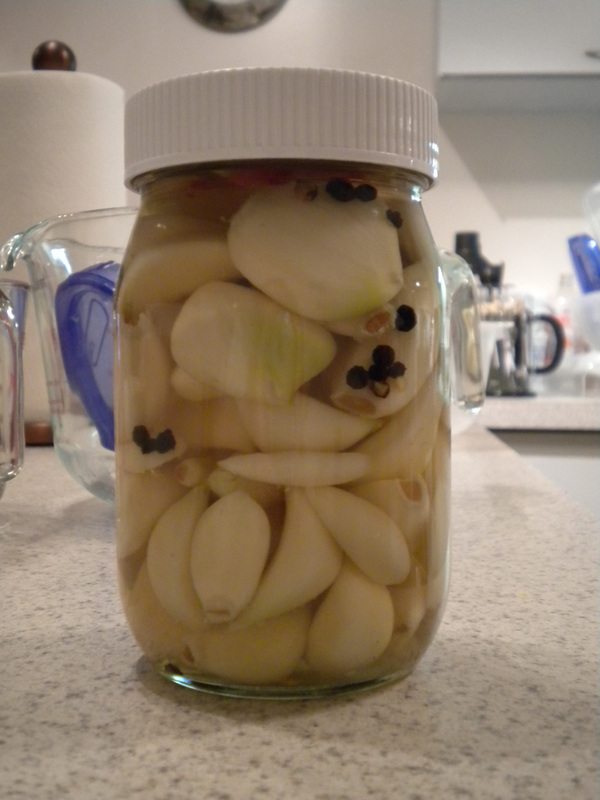
and now - for something completely different...... i love pretty much anything pickled..... peppers, radish, cabbage, pork, cucumber (ya know... pickles....), and GARLIC! this is actually my second attempt at making pickled garlic. the first attempt didn't go so well. that time, i stuck garlic cloves in vinegar and prayed for magic to happen. basically - no magic happened, and i ended up with very raw, vinegar coated cloves. this time around i actually tried a recipe. i found a good looking one in a local cook book called "The Pickle Lady's Pickle Passion". i know... its a mouthful. (i only now realized how dirty this sentence sounds... my apologies, and many immature giggles....heehee!) it starts with a brine of water, vinegar, salt, sugar, hawaiian chili pepper, and pepper corns. bring that to a boil, add in some peeled garlic cloves, and...... well, wait for magic to happen. i'm not posting the recipe just yet b/c i'm still waiting for the magic - but as soon as i give it a proper taste test, i'll give you the verdict, and the recipe. here's to hoping for the best :)
0 Comments
What is Flashback Friday? Click HERE! ********************************************** Original post date: December 8, 2009 Original post link: http://umami-quest.blogspot.com/2009/12/recipe-three-chocolate-cookies.html ********************************************** so i'm watching the Food Network with my friend, and she says "wanna make cookies?" and i say "okay, i actually have this recipe i was looking at; lets try it." now, the recipe below is actually not the recipe i wanted to try; it is that recipe, but altered. altered kind of a lot to the point where it became a new recipe. hopefully, you enjoy it! its 3 chocolate cookies b/c it incorporates chocolate chips, cocoa powder, and white chocolate chips. 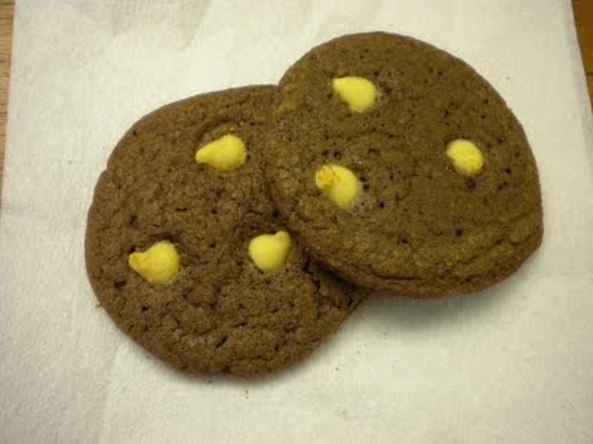
Three Chocolate cookies
- 3/4 cup melted semi-sweet chocolate chips - 2 1/4 cup AP flour - 4 tsp. cocoa powder - 1 tsp. Baking soda - 3/4 tsp. kosher salt - 1 tsp. ground cinnamon - 1 and 3/4 sticks (14 Tbsp.) butter, at room temperature - 1 cup granulated sugar - 2 tsp. vanilla extract - 2 large eggs at room temp. - White chocolate chips Heat oven to 375 degrees F. arrange rack in the middle of oven. Melt the chocolate in the microwave for 30 seconds and stir to make smooth. Set aside. Whisk together flour cocoa powder, baking soda, salt and cinnamon to aerate and break up any lumps. Cream together butter and sugar until light and fluffy. Add vanilla extract, blend well. Scrape down the bowl and add the eggs, one at a time, mixing well after each is added. Mix in melted chocolate by spoonfuls, into the butter and sugar mixture until just incorporated. Drop the dough by spoonfuls about the size of a ping-pong ball on to a baking sheet, leaving about 1 to 1 1/2 inch of space between each ball. Take the white chocolate chips and press a few into the top of each mound – as many as you’d like, or what will fit on top. Bake the cookies for 10 to 12 minutes, until white chocolate chips are just melting a little. Let cool a little before transferring cookies to cooling racks. eat up! good with coffee, milk, etc. 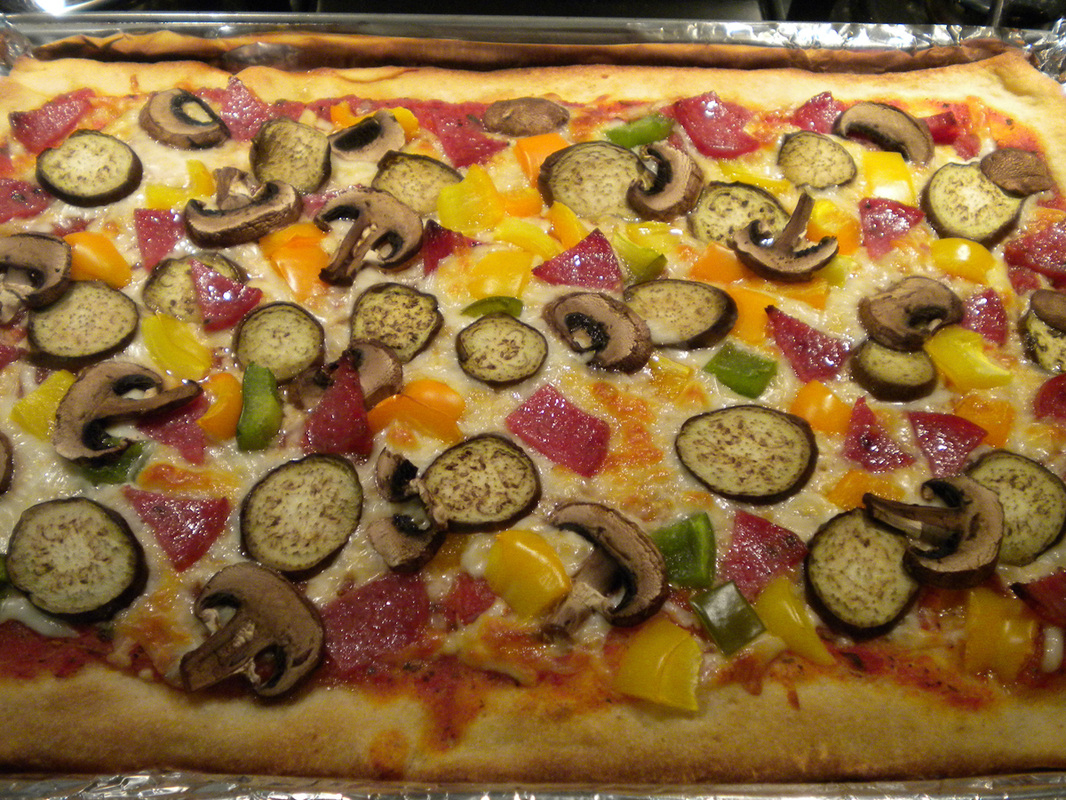 i dedicate this post to pizza.
pizza is simple, delicious, and can be transformed into whatever you want. dessert pizza, vegetarian, carnivore, and more. i've grown to love making pizza at home b/c it is very simple to make. the most recent one i made had some left over bell peppers and eggplant, salami from San Francisco, and porcini mushrooms! cold or hot, its great. breakfast, lunch or dinner.... its pizza time :) while making the pizza you see up top, i ended up having to make some sauce. why? well, turns out, the bottle of sauce i had in the fridge had already expired, and began growing some mold colonies..... i don't know how strong your stomach is, but mine can't handle that. here's what i threw together: - 1 can diced tomatoes - dried oregano - dried parsley - garlic cloves - pinch salt Directions: take all the ingredients and puree them in a food processor or blender. take that mixture and reduce over medium high heat until thickened. cool for about 10 minutes, then use on your pizza dough. what is Flashback Friday? click HERE! **************************************************** Original post date: September 24, 2009 Original post link: http://umami-quest.blogspot.com/2009/09/project-amish-friendship-bread.html **************************************************** we have many interesting conversations at the office where i work. i learn so much there - not only about work things, but about life, politics, ethics, current events, and my favorite thing - food and cooking. they love to eat and try new things, and i'm all for that! in one of our lunch-time conversations, "Friendship Bread" came up. a couple of people (the slightly older crowd) knew what it was, however i did not (basically the younger crowd didn't know what it was). about a month later, UH lab school was selling a cookbook as a fundraiser. i purchased one, and suprise! - a friendship bread recipe was smack in the middle of the book! a few months after that, my co-worker walks in the door and hands me a plastic zip-top bag full of white-ish goo, and says LOOK! she recieved some "starter" from a woman down the hall. now, if you're not familiar with Friendship Bread, i'll try to tell you what i know.... it is supposedly Amish in origin - SUPPOSEDLY. from what i can tell, the sweet cake like recipe currently being circulated is actually nothing like the "real" Amish Friendship Bread. while theirs is more like sourdough (sourdough is made in a similar fashion, using a fermented "starter" - thats how it gets sour), this one is more like cake. the recipe and accompanying starter goo is passed around like a chain-letter, but this is one chain-letter you might actually be happy to get. at first, i was hesitant to take the mysterious bag of goo - i wasnt sure i'd have time to bake, and then, i wasnt sure who i would pass along my starters to.... but i took it, and what resulted was delicious! RECIPE: Amish Friendship Bread For best results, do NOT use any type of metal spoon or bowl for the mixing process. Do NOT refrigerate the bag. If air gets into the bag, let it out. It is normal for the batter to raise bubbles and ferment. If you do not see any bubbles after a day or two, your starter might be un-usable. Be sure to mush the bag!~ 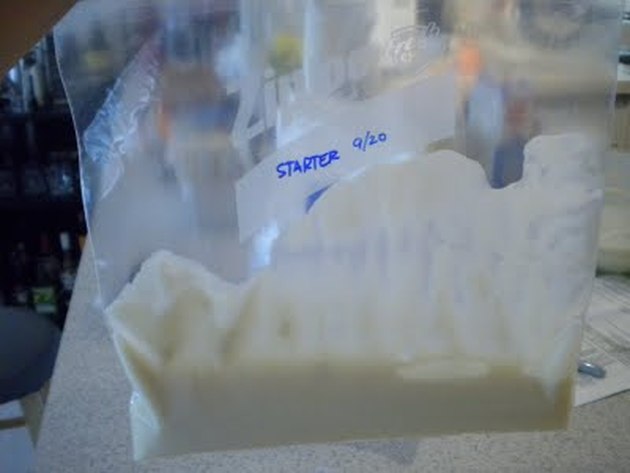 bag of white goo..... please keep the jokes to yourself O_o Day 1 - Do nothing Day 2 - Mush the bag Day 3 - Mush the bag Day 4 - Mush the bag Day 5 - Mush the bag Day 6 - ADD: 1 cup flour, 1 cup sugar, 1 cup milk, then mix within the bag by kneading and mushing Day 7 - Mush the bag Day 8 - Mush the bag Day 9 - Mush the bag Day 10 - Baking day! Follow instructions below  put this white stuff in the goo Combine in a large non-metal bowl, the batter (starter), 1 cup flour, 1 cup sugar and 1 cup milk. Stir thoroughly and...... 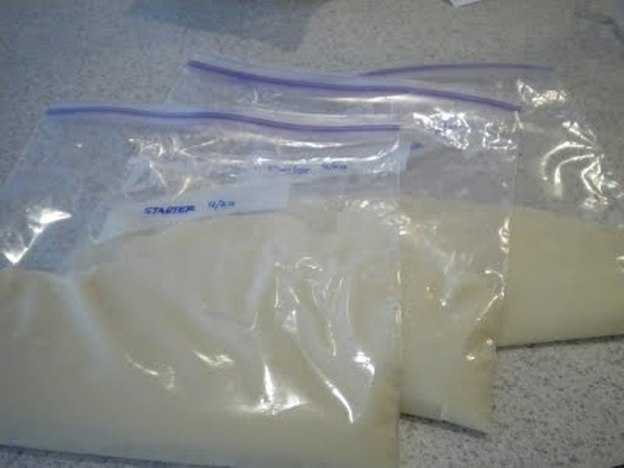 give the goo to your friends pour out FOUR 1 cup starters into four gallon sized Ziploc bags (1 cup of starter per bag). Give away these four starters to four friends, along with these directions. OR - You can keep one starter for yourself, and bake more friendship bread every 10 days, and give away the other 3 starters w/ directions. 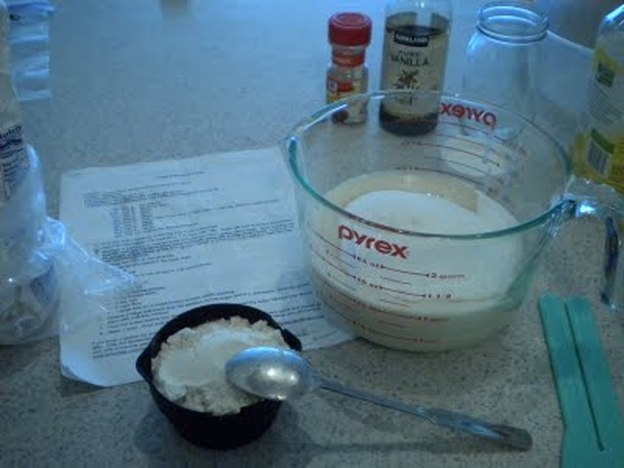 almost cake time! To the remaining batter left in the bowl, add the following ingredients and mix well. - 1/2 cup oil - 3 eggs - 2 and 1/2 cups flour - 1 cup sugar - 1/2 cup milk (i used skim milk) - 1 tsp. vanilla - 2 tsp. cinnamon - 1/2 tsp. salt - 1/2 tsp. baking soda - 2 (3oz.) boxes pudding, any flavor (i used banana cream and vanilla) - 1/2 tsp. baking powder > i also added 1 cup of chocolate chips to mine - you can add in pretty much anything you want. Mix an additional 1/4 cup sugar and 1/4 teaspoon cinnamon and coat the inside of 2 large greased bread pans (or 5 small loaf pans). Add batter and sprinkle with remaining sugar cinnamon mixture. Bake at 325 degrees for 1 hour to 1 hour and 20 minutes. Cool, and remove from the pans. If the starter is not passed on to a friend on the 10th day (your baking day), be sure to inform your friend which day/stage of the process the starter is on that day. 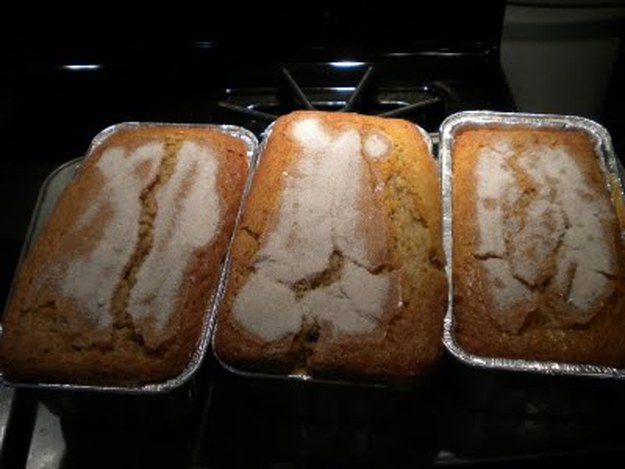 share it with your friends! after all.... it IS friendship bread! i think i'm going to start calling this "Friendship Cake" as it is not Amish, and it tastes nothing like bread. its good no matter what you decide to call it.
i just realized - what if you have no one to give you any starter?! well, i also have a recipe for that! Friendship Bread Starter - 1 (0.25 oz) packet active dry yeast - 1/4 cup warm water - 2 cups AP flour - 2 cups white sugar - 2 cups milk Day 1: Dissolve yeast in warm water in a small bowl. Let stand for 10 minutes. Combine 1 cup flour and 1 cup sugar in a 2 quart glass, plastic or ceramic container (do not use metal) and mix thoroughly. Slowly stir in 1 cup of milk and dissolved yeast mixture. Cover loosely and let stand until bubbly. Store loosely covered at room temperature. Day 2 - 4: stir with a non-metal spoon Day 5: stir in 1 cup flour, 1 cup sugar and 1 cup milk Day 6 - 9: Stir with a non-metal spoon Day 10: Proceed with Friendship Bread recipe thats it! have fun! 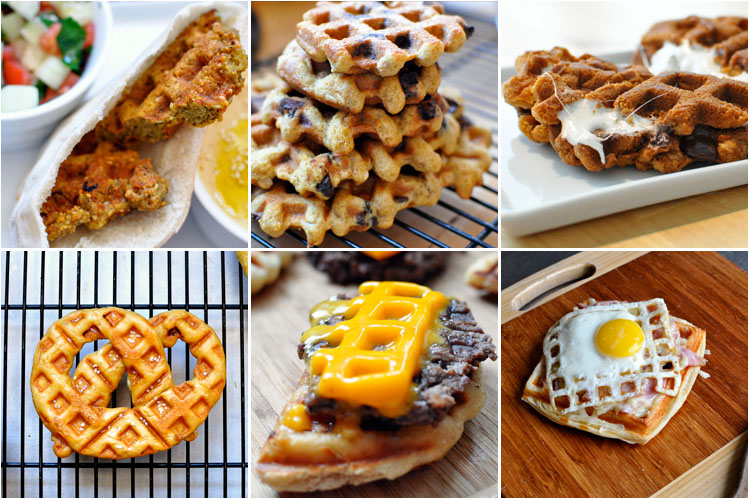 waffle the possibilities http://www.waffleizer.com/waffleizer/
click that link.... click it! if you're familiar with the idea behind "will it blend?" - then you'll understand "Will it waffle?" ...... p.s. - CHOW.com did an article featuring this same idea back in 2008. you can read it HERE. Jook, Chook, Juk.... any which way you pronounce it (or spell it), its pretty much the same dish. for me - it is a dish my mom used to make after thanksgiving. why after thanksgiving? b/c then she'd have access to abundant amounts of turkey bones. using those turkey bones (with small amounts of meat still attached), she'd boil and boil and boil these bones until any leftover meat fell right off. throwing together a few simple ingredients, in a few hours we'd have hot and tasty jook to warm us up as the weather began to get colder. I've learned over the years that Jook is a ridiculously simple dish to make. i'm fairly sure it is a Chinese dish, but lots of Asian cultures have their own versions. some might know this as "congee" because this is a type of rice porridge. whatever you call it, its good comfort food, great for cold days and nights. i saved 2 turkey legs (frozen since last Thanksgiving) in my freezer in anticipation of making jook. i actually forgot about them until i recently cleaned out my freezer. HOORAY! Jook time :) 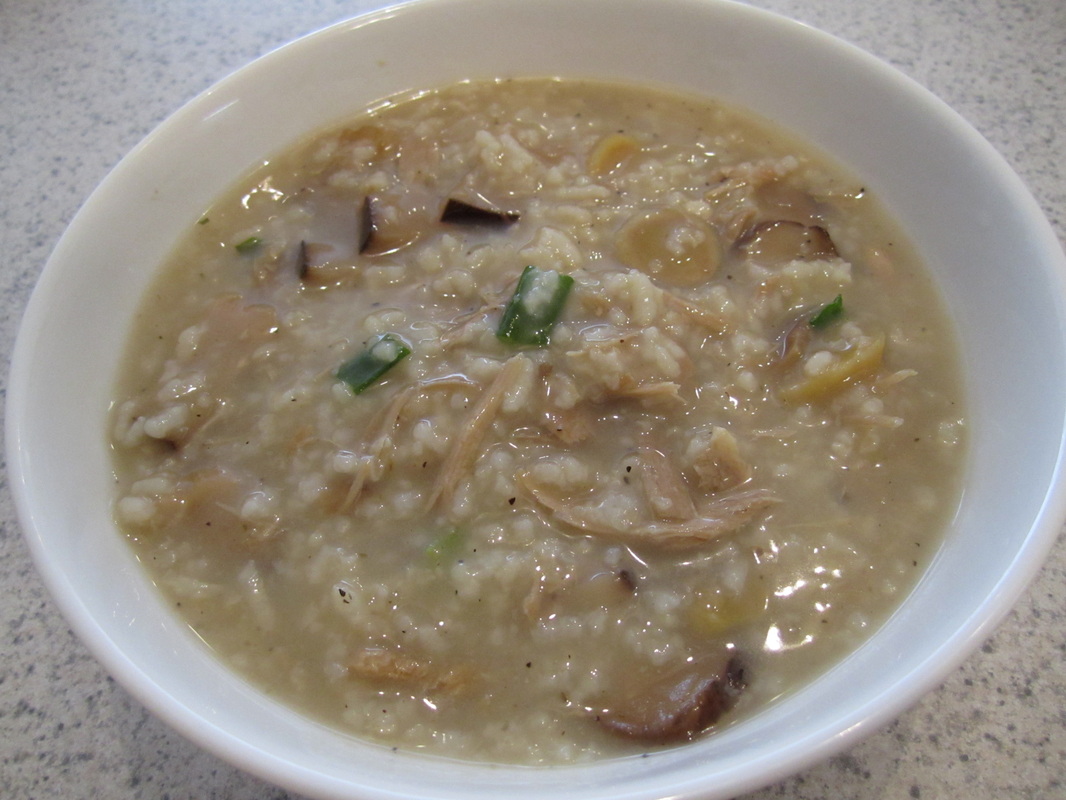 a bowl of hot deliciousness JOOK:
put in the turkey legs, and boil for 1 hour, or more, until the meat falls off the bones. when bones are clean, remove them, and then pick through the pot taking out any small bones and skin (you can leave skin in if you like). shred up meat into smaller pieces. while turkey legs are boiling, soak shiitake mushrooms in water for an hour or more. also, chop up ginger into slices. when shiitake mushrooms are thoroughly soaked through (no hard dried spots), chop up into pieces. add in the mushroom pieces and ginger slices. DO NOT DISCARD THE MUSHROOM WATER. add this water into the pot as well. Taste the broth - if it needs more salt or pepper, adjust right now. add in rice, and simmer every thing for another 30 mins, uncovered, stirring occasionally. if your jook looks thick - good. if not, simmer for another 15 - 20 mins. during last 5 minutes of cooking, add in chopped green onions. NOTE: next time, i thinking of adding in wakame seaweed... what do you think? ANOTHER NOTE: you don't have to use exclusively turkey legs. you can take an entire turkey carcass, and some left over turkey meat, and do this same dish. also, if you don't have turkey, you can sub chicken. What is "Flashback Friday" ? click HERE! *********************************** Original Post date: October 31, 2010 Original link: http://umami-quest.blogspot.com/2010/11/chili-sans-beans.html *********************************** there are some people who like beans in their chili. i am not one of those people. i feel like beans in chili are just filler, and they get in the way of the chili itself. kidney beans in particular are like little gritty nuggets of killjoy in a bowl of chili.... but again, this is just my opinion. i made chili many years ago in high school, and it came out pretty good from what i remember. i have not made chili since then, but always meant to. so, here we are, about 10 years later. and i still haven't made any chili since then. while my original chili recipe contained several canned goods - my cooking skills have matured, and i have found that i don't like using canned goods (when i really, REALLY want to cook) while cooking. do not misunderstand - i do in fact pop open cans of stuff when i'm lazy/really hungry/both. BUT, when i really want to COOK something, i avoid cans as much as i can..... mind you, the only thing in this particular recipe that was commercially made was the salsa - and i only used it because i wanted to get rid of it. under normal circumstances, i would have used fresh ingredients in place of it (onions, tomatoes, jalapeño... you get the idea). honestly, i only decided to make chili b/c i had a spare 10 tomatoes on hand, and i had no idea what to do with them..... this recipe is not as involved as i wanted it to be, but i did manage to utilize the ingredients i had at the time. next time i will use the other stuff i mention throughout the recipe, and additional notes at the end....... enjoy! (P.S. - if you really want to add beans, you could add 2 cups of pre-soaked kidney beans to this recipe, before simmering.... but i think it would be a shame) 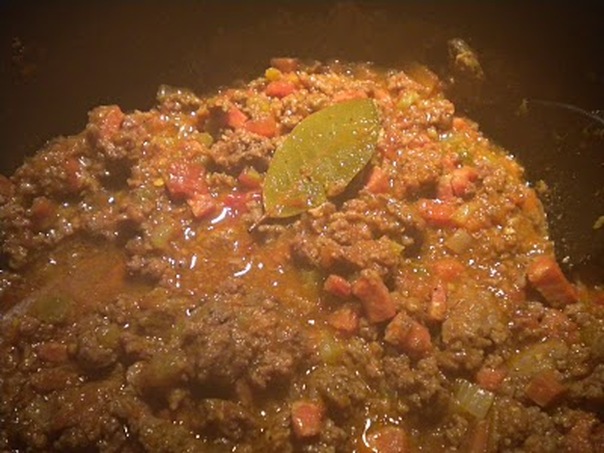 its getting steamy up in here 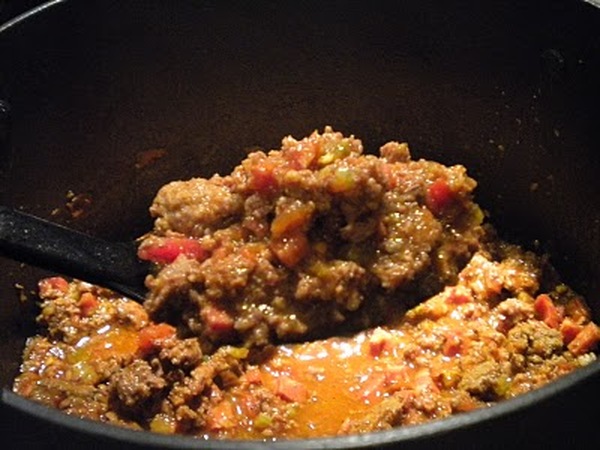 money shot 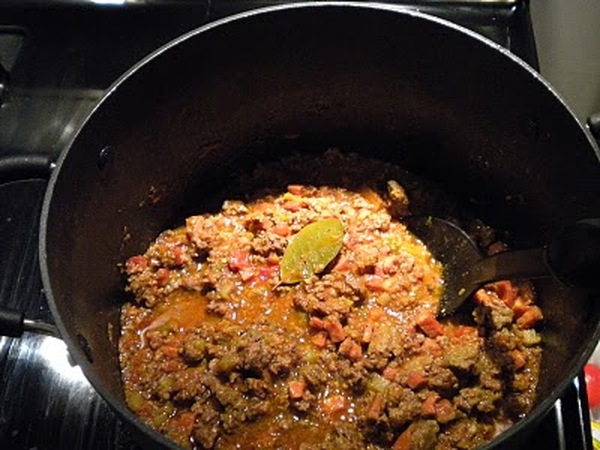 time for eats :D Chili round 2 (created 10/30/10)
(NOTES: add next time: beer, more celery, more smoked paprika, omit regular paprika, omit salsa and add fresh onion, garlic and jalapeno instead) *** 02/03/12 = the last time i made this recipe (about a month ago maybe?) i added BACON. if you'd like to add some, chop up 5 rashers into 1 inch pieces. cook them in your chili pot, until their crisp. remove and cook onions in that oil. remove excess grease before cooking hamburger meat. ENJOY! |
 RSS Feed
